Showing posts with label cookies. Show all posts

Wednesday, March 12, 2014

Double Chocolate Brownie Cookies (gluten free, vegan, low sugar)

Every Friday night my family enjoys what we call "treat night".  
We eat our dinner in front of the tv (horrific I know), and enjoy the treats we have been longing for ALL week!  
As you may or may not know, it is Lent for some of us - which means abstaining from certain chosen things for a period of 40 days before Easter.  Some people choose to abstain from things like Facebook, or television, and chocolate seems to be popular.  
Our family enjoys choosing extreme challenges during Lent - like the three years we cut our grocery allowance to $2.00/day per person.  
Well, Friday night treat night is not exempt from Lent.  I was worried the kids would be sad and not have motivation to achieve the goals I've set for them to be able to participate in treat night, but after our first successful week with these cookies I KNOW they are motivated to make it to next Friday. 
They know the leftovers are in the freezer and are counting down the days
until Friday.  
Who could blame them?

Double Chocolate Brownie Cookies


Preheat oven to 350 and line a large baking sheet with parchment paper. 

2 tablespoon ground flax mixed with 6 tablespoons water
1/2 cup virgin coconut oil (do not melt)
1/2 cup almond butter (natural)
1/3 cup unpacked brown sugar
1/3 cup natural cane sugar
2/3 cup unsweetened applesauce 
2 teaspoons vanilla extract

In a small dish mix together the flax and water and set aside for a few minutes so it can thicken up. Whisk the flax again once thickened.
In a large mixing bowl (preferably stand mixer) cream your coconut oil until light and fluffy. Continue to add the wet ingredients - sugars, applesauce, vanilla and flax mixture. 
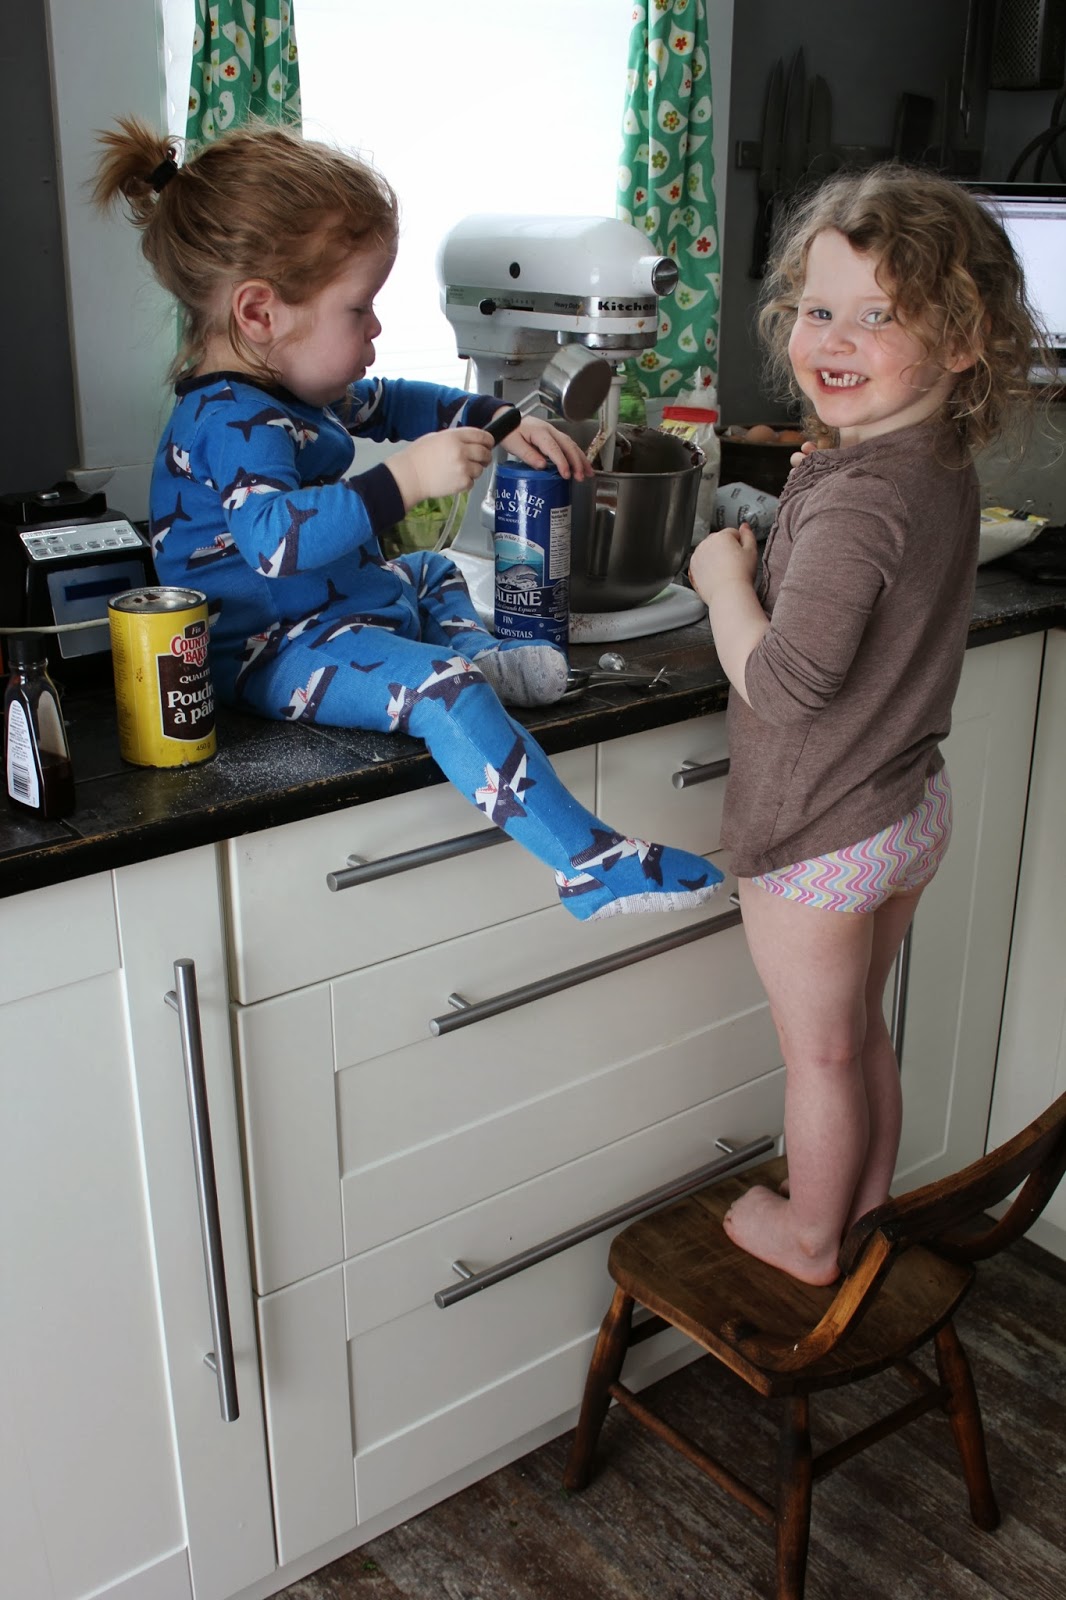
Baking with my little "helpers".  Matilda turned the mixer on high after adding the oat flour and we had an explosion of flour in the kitchen.  Fun times.  
1 teaspoon baking soda
1 teaspoon baking powder
1 teaspoon fine grain sea salt
6 tablespoons cocoa powder
3 cups gluten-free rolled oats, processed into flour (just pulse in your blender for flour)
1/2 cup semi-sweet chocolate chips (dairy free)

Add dry ingredients one at a time.  If your dough is a bit dry, add a little more applesauce. The dough should be moist enough to form balls without cracking, but not super sticky.  Lastly, add the chocolate chips.  

I used my ice cream scoop to measure out my cookies (I use it for everything, I wish I had all the sizes).  I filled it half way each time and that gave me roughly 2tbsp sized balls.  Place on the cookie sheet 2-3 inches apart and press down just a bit so it's more of a disc and not a ball.  Bake for 12 minutes.  

Makes roughly 2 dozen large cookies.  It's hard to say - my little helpers ate a LOT of the dough before I had a chance to put it in the oven.  
No raw eggs = cookie dough pig out.  


These are excellent when slightly warm or when completely cooled.  They are not fragile or difficult to handle like some gluten free cookies, so feel free to handle them like a "normal" cookie.  

Happy Baking!


*This is an adaptation of a DELICIOUS cookie from Oh She Glows.  The original recipe uses more sugar than I'd like, so I doubled the batch and kept the sugar the same adding applesauce to sweeten and moisten.  If you'd like to give the original a try, visit her site and try the other recipes she has - it's a new favourite of mine!*  http://ohsheglows.com/2014/02/27/one-bowl-double-chocolate-chunk-cookies/


Monday, March 3, 2014

Poop Cookies

You are what you Eat!

Actually, that saying does ring true for a lot of people. 
Every time I sneak a Tunnock Snowball - standing face-to-wall in the corner of the kitchen, I look at the fluffy little treat and sadly think to myself "you are what you eat". 
It's basically marshmallow if you've never had one.  
Then I look at the snowball again and eat it quickly because I can hear tiny feet running towards me. 


I digress. 
 Today's recipe may have you scratching your head at my parenting sensibilities - but let me tell you something… we had so much fun.  
Making the cookies, laughing hysterically at what great poop shapes we could make, deciding what poop shape each of us should go with, deciding how to play the prank out, actually playing the prank out, and eating it still under the pretence that it was real poop.  Really - so much fun!  
The cookies taste great too, so it was a win-win-win.

My lovely boy found a practical joke book at the library (3 of them actually) and plotted how to use the pranks on his older sister.  
We agreed on one, and incorporated it into our "treat night".  

Poop Cookies

1/2 cup butter
1/2 cup sugar
2tbsp cocoa 

Preheat oven to 375

Melt butter, sugar and cocoa on medium heat until sugar is dissolved.  Set aside. 

1 egg
1/2 tsp vanilla
green food colouring
1/2 cup brown sugar (packed)
1 cup flour
1/2 cup oats
1 cup corn flakes, rice krispies, or other cereal (we used rice krispies)

Mix egg, vanilla and 5-8 drops of green food colouring.  Add the brown sugar to the eggs, and mix thoroughly.  Add 1/2 cup flour and mix.  Add cocoa/butter mixture, mix.  Add remaining 1/2 cup flour and make sure it's mixed thoroughly. Add the oats and cereal.  

Line a baking sheet with parchment and place cookies or logs (wink wink) two inches apart.  If your dough is quite warm or you do not want your cookie to spread - pop it in the fridge or freezer for 10-30 minutes before baking.  I did not do this.  The kids couldn't wait that long.  Bake 10-12 minutes.  If you want a truly convincing cookie, set the timer for the 9 minute mark - take the cookies out and with two heat proof spatulas (or butter knives) squish the edges in.  This will stop and repair any spreading the cookie did while baking and add cracks that make it more realistic.  The cracks are also helpful for sticking peanuts or candy corn in, if you are so inclined.  

I lined a baking tray with parchment paper and wrote each child's name on the sheet in pencil (except the older sister we were pranking).  I gave each child an ice cream scoop of batter to create their own "poo" shape and place on the baking tray under/on their name.  Scooping dough ensured everyone had the same amount of dough (no fighting) and labelling the tray meant we didn't have to try to remember the details of each poop for later identification.    


We had a few extra cookies that were in the house for 3 days and were still really fresh after that time.  Just pop any leftovers in a sealed container and you can have fresh poop for days!  

I think this would be a GREAT treat to send in a school lunch! 


Happy Baking!

If you're still reading, I have a funny little story to share.  As you can see, some of the cookies were eaten outside.  I was out with the kids for a while, but the youngest was fussy and we went in leaving the older ones to play.  After a short while my 3 year old daughter came to the back door saying she lost her cookie somewhere in the snow.  
Well, we have a dog.  A dog with similar sized poop. 
 The boys were buckled over with laughter as I begged her not to search for her cookie in the snow, and DEFINITELY not to eat any suspected cookies until I confirmed if it was indeed a cookie or not. 
 I guess this is a warning - if you make these, maybe get your kids to eat them somewhere your doggie doesn't do his business.  

Monday, December 16, 2013

Cashew Cookies & Burnt Butter Icing

My sister makes these cookies almost every Christmas.  
The first time she told me what they were - I thought, well cashews are a great way to ruin a cookie!  
And then, I tasted one.
They were delightful.  Yes, they - I definitely had more than one. 
I've realized that nuts, fruits and seeds don't ALWAYS ruin a perfectly tasty dessert - haha. 
Well, that sister is in Haiti until 2 days before Christmas so I'm left to make my own 
delicious, addictive, freezable, share-able, oh-so-tasty
Cashew Cookies!


Preheat oven to 375

1/2 cup softened butter
1 cup brown sugar (packed)
1 egg
1/3 cup 0% Greek yogurt (you can use sour cream if that's what you keep on hand)
1/2 tsp vanilla

Cream butter and sugar until fluffy.  Add egg, yogurt and vanilla and mix well.  

2 cups flour
3/4 tsp baking powder
3/4 tsp baking soda
1 tsp salt

1 1/2 - 2 cups cashews
     I used whole cashews because I knew my stand mixer would break them down.  If you are using your hands, or a hand mixer you will want to use cashew halves. 

Mix dry ingredients in a bowl and add to the wet ingredients in thirds until well mixed.  Once dry and wet are combined add cashews and mix again.  

I used my lovely melon baller scoop to make evenly sized 1 inch ball cookies, and baked them for 8 minutes.  If you are using a bigger scoop put the timer on for 8 minutes and have a peek, they may need up to 11 minutes depending on the size.  Bake until just lightly browned.   They will seem spongy but if they're brown they're done :)

Let cookies cool completely before icing.  Don't bother eating a bunch of the cookies without icing, they are ok - but they aren't amazing without the icing.  Trust me on this one.  

1/2 cup butter, browned and cooled to room temperature
1/4 tsp vanilla
2 cups icing sugar
2 tbsp cream (heavy cream, full fat milk, whatever you have will be fine)

If you missed the post where I made burnt butter icing for my Shortbread Saturns, first of all - you're missing out - http://onlyfitinjustenough.blogspot.ca/2013/10/shortbread-saturns.html   Second of all, to brown butter - place butter in sauce pan on medium high heat.  The butter will melt and as it stays on the heat it will start to brown and smell very much like caramel.  Swirl the pan or stir the butter to ensure the brown bits don't settle and become black bits - and that's it.  Once the butter is a lovely brown colour and smells like heaven, take it off the heat and let it come back to room temperature before making icing.  

Ice the cookies and enjoy!  If you want to store these in the cupboard, let them "dry" on the counter (maybe under a towel) for the night before packing them away.  If you plan on freezing them for Christmas, just line a baking tray with the cookies - pop in the freezer until solid (2 hours) and then transfer to an airtight container.  When thawing, be sure to separate the cookies so they don't begin to stick together.  

Bon Appetit!


Thursday, October 31, 2013

Gluten free vs. All Purpose - Oatmeal Cookies

Gluten Free Wins Again!

Gluten free is tricky.  So many things have wheat in them, and for someone who loves baking it can be incredibly difficult to get the hang of.  My little guy is on a gluten free trial to see if it helps some of his medical issues, so I can't just give up because I'm trying it as a diet fad.  My lovely sister is so great with gluten free, she has been accommodating a gluten free child for years and has some great recipes on her blog Bushel and A Peck if you are looking for recipes that mix different flours instead of using a mix like I am in this recipe.  I'm cheap.  There's no nice way to put it, I love saving money - it makes me feel like a superhero.  I have tried mixing flours and all the different ingredients to make gluten free recipes but I usually just end up throwing whatever I've made out because it's completely inedible.  So, in the short term it looks as though mixes can be more expensive - BUT if they make food that I don't have to throw out, it's really the most economical decision.  I've used the same recipe for these oatmeal cookies, one with regular all purpose flour and one with a gluten free mix.  In all honesty, there is no taste or texture difference between the two, and I'm happy to say I have another gluten free recipe under my belt.


Amazing results from the gluten free flour mix - identical tasting cookies!

    3/4 cup Butter 
    1 1/4 cups firmly packed brown sugar
    1 large egg
    1/3 cup milk
    1 1/2 teaspoons vanilla 

    Cream butter, and sugar until fluffy.  Add egg, milk and vanilla and blend well.

    In a separate bowl, mix dry ingredients:

    1 cup flour (all purpose or gluten free mix)
    1/2 teaspoon baking soda
    1/2 teaspoon salt
    1/4 teaspoon ground cinnamon
    3 cups old-fashioned rolled oats

    Mix dry into wet, and add any extras after well blended.  I made mine plain, but after baking most of the batch added 1 cup coconut and chocolate chips to a few, because, well... I love coconut and chocolate.  

    Bake at 375 for 10 minutes or until the edges just start turning golden brown.  I (again) used an ice cream scoop to get perfectly shaped and similar sized cookies.  

    Saturday, October 26, 2013

    I miss my Nanny-O

    Cooking from Nanny's Favorites

    Marjorie O'Neill.  I loved that woman.  She was so sweet to me, even when she had no reason to be.  She taught me how to knit (several times), taught me how to bake but more importantly taught me to be a better person.  To be patient, to listen, to serve others with a happy heart and to show love through baking.  This is one of her recipes I added a trendy ingredient to.  It doesn't make me cry like her Belgium Cookies (renamed Crying Cookies) but I do love opening her cookbook and remembering her in this small way.  


    Nanny called this recipe "Chocolate Cookies" which might lead someone to believe they are dark, with cocoa in the recipe.  I renamed it, but the ingredients are the same-ish.


    1/2 cup butter
    1/2 cup shortening
    1 cup brown sugar
    1/2 cup white sugar
    2 eggs
    1 1/2 tsp vanilla

    Cream butter, shortening*, sugars, eggs and vanilla until light and fluffy. 

    2 1/2 cups all purpose flour
    1 tsp baking soda
    1/2 tsp salt

    I make a well in my wet ingredients and blend the dry ingredients in the well before mixing into the wet.  If you want to do that separately (mix dry, add to wet), that's totally cool but you're doing an extra dish. Mix dough thoroughly.
    1 cup semi-sweet chocolate chips
    1 cup milk chocolate chips
    1 tbsp rock salt

    Mix chocolate chips and salt into dough so it's evenly dispersed, no mouthfuls of salt once baked - blah.

    Bake at 375F for 8-10 minutes until just brown on the edges.  I used an ice cream scoop to make even sized jumbo cookies, and 10 minutes did the trick.  

    *Do you ever wonder how bakeries make such yummy treats?  It's because they use things you don't normally use.  Shortening, lard, tapioca starch - stuff we don't normally add to our cookies can really make a difference.  If you don't want to use shortening in the recipe, replace it with butter (or any other fat - margarine, coconut oil) - but you eat shortening all the time and don't know it*


    Just say Yes

    Utilizing a budget means making small choices that add up to big numbers.  No impulse buys (even when it’s only a dollar or two) , and n...